Following my previous article, Using Android Studio to View Android Lollipop Source Code, we know that simply reading code has its limits—understanding can remain superficial and easily forgotten. In contrast, code you’ve personally written or modified tends to leave a much deeper impression, and the process becomes easier to grasp during the implementation phase. While studying the source code, being able to modify it, run it on a phone, and see the results firsthand significantly boosts both learning efficiency and enthusiasm. This article explains how to compile the Android Lollipop source code yourself and run it on a Nexus 5.
Why compile your own firmware instead of using Google’s factory images?
Google’s factory images are “User” builds, which are highly restrictive and prevent you from pushing files to the system at will. Compiling your own “Userdebug” build gives you the freedom and root access needed for deep development.
This guide assumes you have already downloaded the Android Lollipop source code and own a Nexus 5 (an essential tool for system developers). If you haven’t downloaded the source or haven’t configured your build environment yet, please refer to the official guides: Initializing a Build Environment and Downloading the Source. (Note: These resources are best accessed through a direct connection without local restrictions).
It’s also important to understand AOSP (Android Open Source Project). The source code downloaded from Google is the AOSP version, which does not include Google’s proprietary applications (GMS). This is the same baseline that manufacturers receive. Google’s factory images, however, include the full suite of Google services. Passing Google’s certification to include these services is a complex and often expensive process, which is why many domestic manufacturers omit them.
1. Initializing the Build Environment
Run the following command in your terminal:
1 | . build/envsetup.sh |
2. Choosing the Target
Run the lunch command:
1 | lunch |
3. Selecting the Device
You will see a menu similar to this:
1 | You're building on Linux |
3.1 Device Reference Table
| DEVICE | CODE NAME | BUILD CONFIGURATION |
|---|---|---|
| Nexus 6 | shamu | aosp_shamu-userdebug |
| Nexus 9 | volantis (flounder) | aosp_flounder-userdebug |
| Nexus 5 (GSM/LTE) | hammerhead | aosp_hammerhead-userdebug |
| Nexus 7 (Wi-Fi) | razor (flo) | aosp_flo-userdebug |
| Nexus 4 | occam (mako) | full_mako-userdebug |
3.2 Build Types Explanation
| BUILDTYPE | USE |
|---|---|
| user | Limited access; suited for production releases. |
| userdebug | Similar to “user” but with root access and debuggability; preferred for development. |
| eng | Development configuration with additional debugging tools; maximum debuggability. |
After selecting aosp_hammerhead-userdebug, you will see a confirmation summary:
1 | ============================================ |
4. Setting Up Drivers (Proprietary Binaries)
Next, you need to download the proprietary drivers required for Nexus 5 from the Google Developers website. You will typically need drivers from Broadcom (NFC, Bluetooth, Wi-Fi), LG (Camera, Sensors, Audio), and Qualcomm (Graphics, GSM, GPS, etc.).
Once downloaded, extract the three .sh files into your Android source root. Execute them, and they will place the relevant driver files into the vendor/ directory.
5. Starting the Build
Run the compilation command:
1 | make -j8 |
(Adjust -j8 based on your number of CPU cores). If everything is configured correctly, after a significant wait, you will see a success message indicating the system.img has been installed.
6. Flashing the Firmware
Power off your Nexus 5 and enter fastboot mode (typically by holding Volume Down + Power). From the root of your source directory, run:
1 | fastboot -w flashall |
The device will automatically reboot once the process is complete.
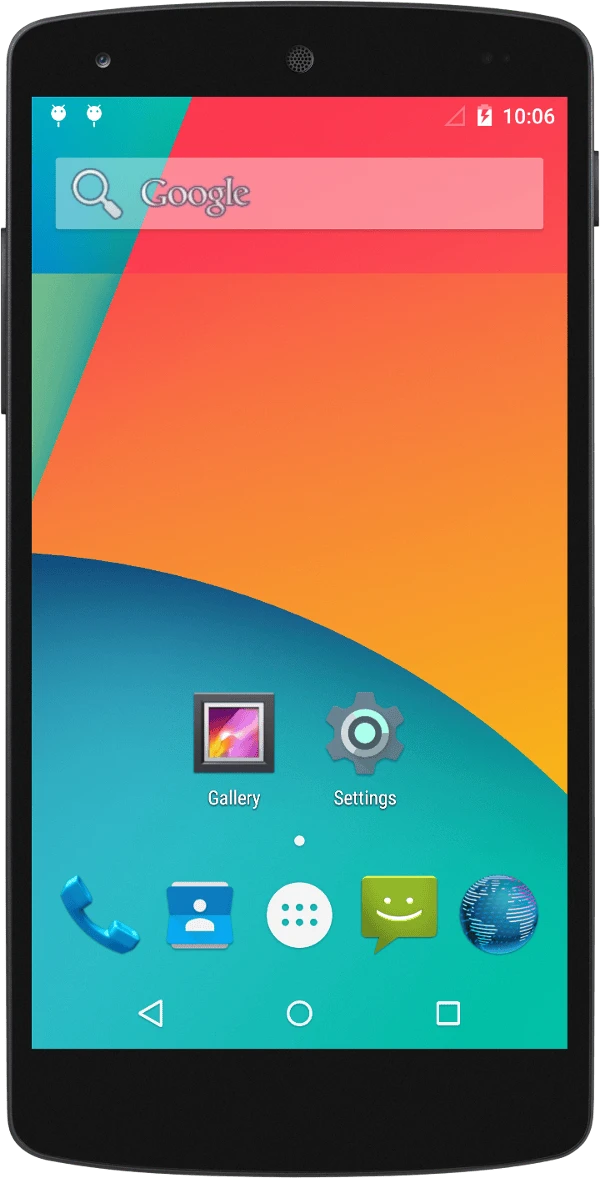
7. The Result: A Pure AOSP Desktop
About Me && Blog
Below are my personal details and links. I look forward to connecting and sharing knowledge with fellow developers!
- About Me: Includes my WeChat and WeChat group links.
- Blog Navigation: A guide to the content on this blog.
- Curated Android Performance Articles: A collection of must-read performance optimization articles. Self-nominations/recommendations are welcome!
- Android Performance Knowledge Planet: Join our community for more insights.
“If you want to go fast, go alone. If you want to go far, go together.”