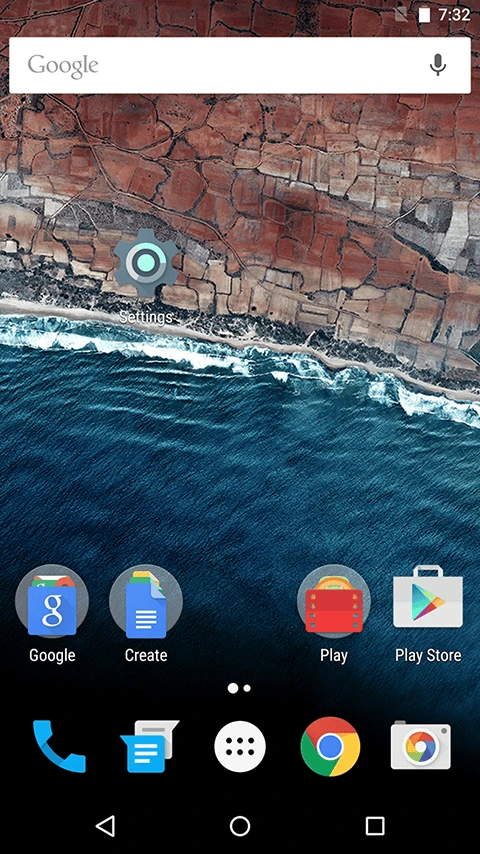
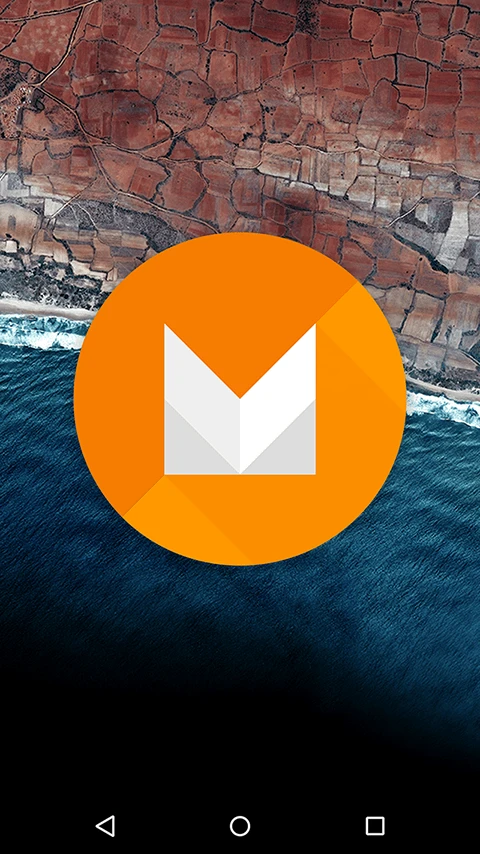
Following yesterday’s Google I/O, Google released the Android M Preview for Nexus 6. You can download the firmware from the official Google website. Once flashed, you can experience the latest features of Android M. Below are the main settings screen and the Easter egg screen:
Changes
- The most noticeable change in Android M is the app drawer:
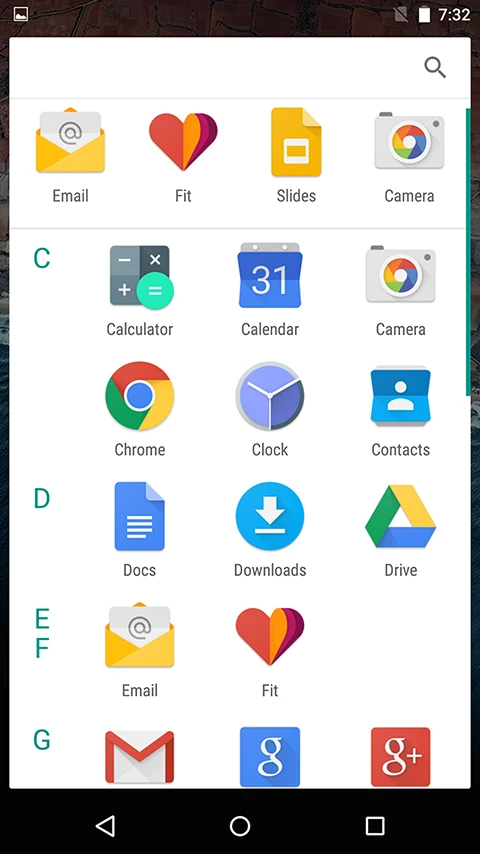
As shown, the apps in the drawer are indexed alphabetically. The top row shows frequently used apps, which currently cannot be customized.
Another significant change is in the animations—both folder animations and app launch animations have been updated. It’s hard to describe in words, so you’ll have to experience it yourself.
You can now set themes in the settings, although currently only “Light” and “Dark” are available.
Multi-Window Mode
Multi-window mode is not enabled by default in the official Android M Preview firmware. This is because the official build is a “user” build, while multi-window mode is only toggleable in “userdebug” builds. Therefore, it must be enabled manually.
Flashing a Third-Party Recovery
1. Enter Bootloader Mode
1 | adb reboot bootloader |
2. Flash twrp.img
I downloaded this TWRP image from the official site. Since the official download can be slow, I’ve also uploaded it to a cloud drive (Baidu Netdisk) for convenience: twrp
1 | fastboot flash recovery ~/Downloads/twrp-2.8.6.0-shamu.img |
3. Mount System
After flashing the recovery, do not reboot the phone. Enter Recovery mode directly, go to “Mount,” and check the “System” option. This step allows you to modify the /system directory.
4. Modify /system/build.prop
Check if the device is recognized using adb devices. If it is, enter the shell:
1 | adb shell |
Then, use vi to open system/build.prop:
1 | vi system/build.prop |
Find the line:
1 | ro.build.type=user |
And change it to:
1 | ro.build.type=userdebug |
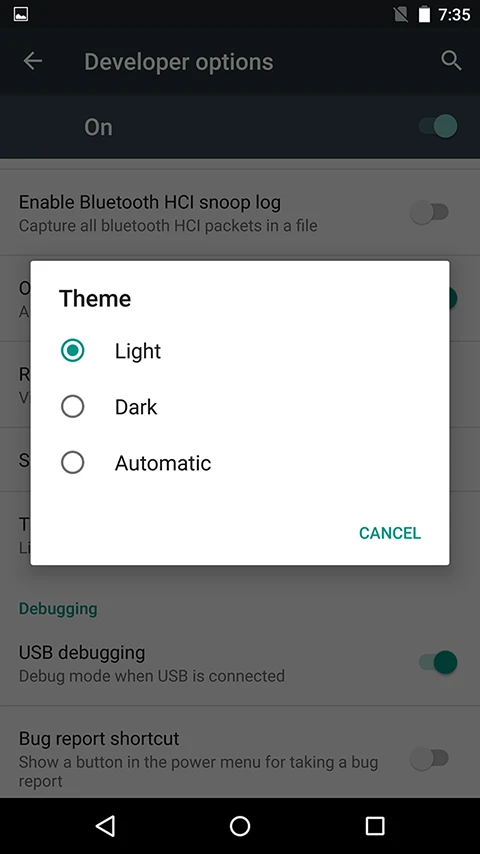
Save and exit the shell. Then execute adb reboot. After the reboot, you will find a new option in Developer Options:
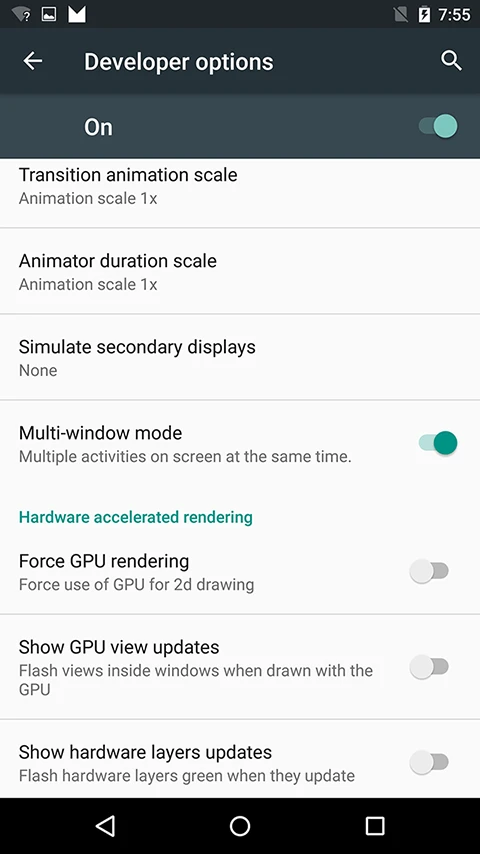
To use multi-window mode, tap the “Recents” (multitasking) button and select one of the three boxes on top of a task window:
- The first one places the window in the top half.
- The second one places it in the bottom half.
- The third one sets it to full screen.
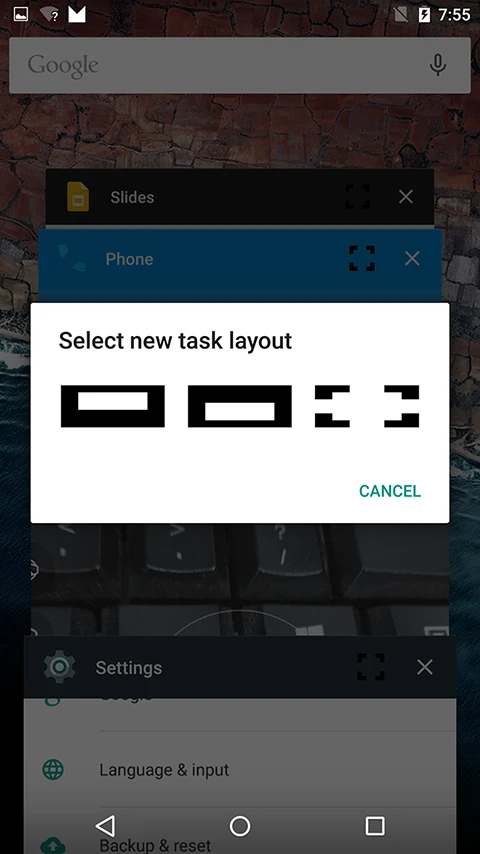
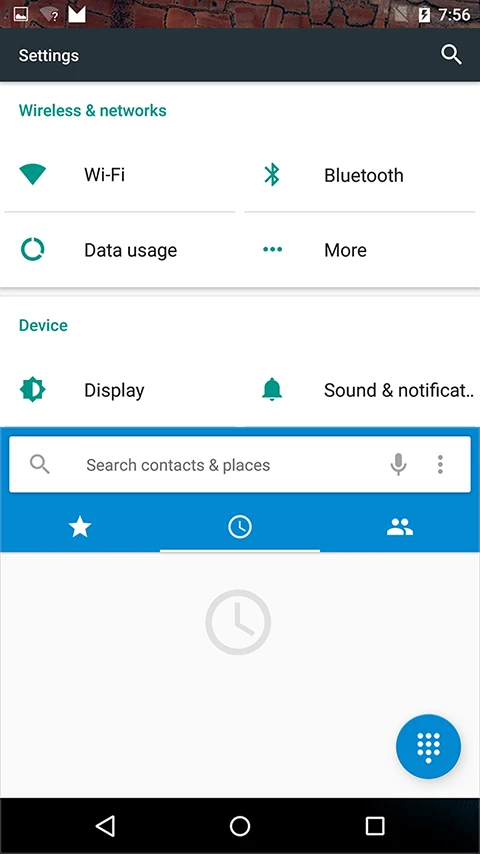
Then you can see the result:
Afterword
While it’s called “multi-window,” Currently it only supports two windows. The space utilization for two windows isn’t very high yet, and anything more would be even less practical for now. We’ll see how Google develops this further.
Actually, Samsung implemented multi-window long ago, and theirs even supports dynamic resizing. However, at this stage, it feels more like a experimental feature than something for daily use. It might take a few more iterations to mature.
The original Chinese version of this article can be found on Jianshu: Nexus6-with-Android-M开启多窗口模式.
About Me && Blog
Below is my personal intro and related links. I look forward to exchanging ideas with fellow professionals. “When three walk together, one can always be my teacher!”
- Blogger Intro
- Blog Content Navigation: A guide for my blog content.
- Curated Excellent Blog Articles - Android Performance Optimization Must-Knows
- Android Performance Optimization Knowledge Planet
One walks faster alone, but a group walks further together.